The China Dish journal / A closer look
How Plaster Molds for Slip Casting Form a Hollow Pot
Follow a two-piece plaster mold from filling to release, and see how absorption, drying and the fit between the halves shape a hollow ceramic cup.
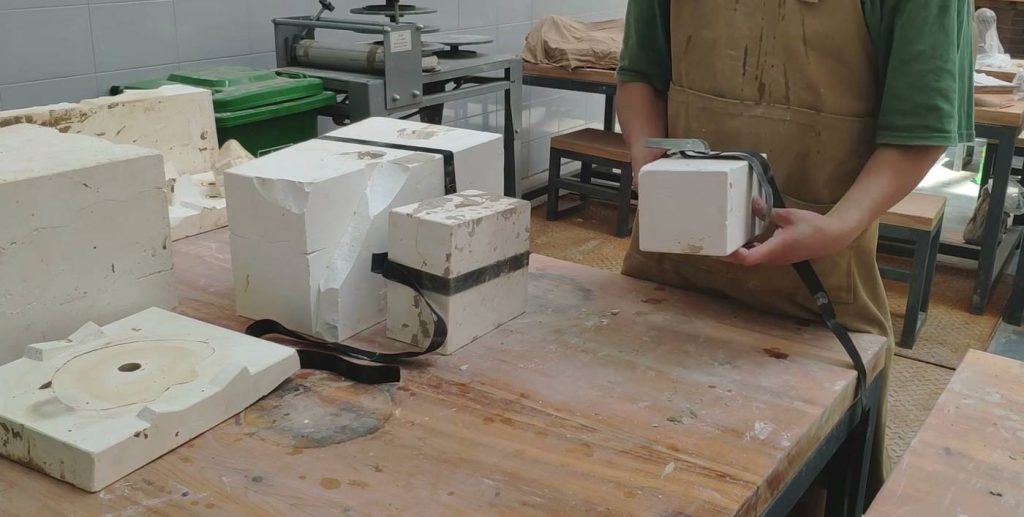
Pour liquid clay into a plaster mold, wait, and you can pour liquid clay back out. What stays behind is the pot. Plaster molds for slip casting have tiny pores that draw water from the slip. Clay particles collect against the mold, forming a wall that follows its curves. Draining the still-fluid center leaves the pot hollow. Before the potter can take it out, that wall needs time to firm up.
Where does the water go?
In slip casting, water carries fine ceramic particles into the open cavity and against its sides. At that boundary, water enters the connected pores of the plaster by capillary action. As more water passes into the mold, the clay wall grows inward. The mold fixes the curve on the outside of the pot. The inside surface forms where the growing layer of clay meets the slip that can still flow out.
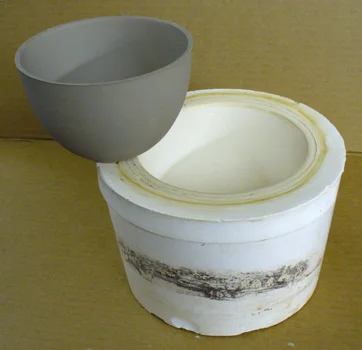
The bowl has already left the mold, but both still hold water. The bowl will dry further before firing. In the plaster, water travels away from the cavity toward an exposed surface, where it can evaporate. How much water the plaster still holds when the potter refills it affects how quickly the next bowl forms. The porcelain materials guide follows the clay beyond forming and into the kiln.
When does a potter drain the mold and open it?
Angelo di Petta recorded both decisions while making a small oval cup. He filled a dry, two-piece plaster mold with red earthenware slip. After about 20 minutes the wall had reached the thickness he wanted. He poured off the liquid center and left the mold upside down for roughly 10–15 minutes so the last of the slip could run out. At this point the cup was already hollow and the mold was still closed.
Di Petta then turned the mold upright and trimmed away the reservoir, the extra clay at the pouring opening above the cup. He waited until the cup firmed and pulled away from the plaster before removing it. In his photographs, the trimmed opening in figure 3 and the free-standing cup in figure 4 mark two different moments. He let the cup dry before cleaning the seams. The times describe this particular cup and slip. For release, the sign he gives is the clay drawing away from the mold. Angelo di Petta, “Building a Weathered Surface,” figures 1–4
Why can the same mold cast more slowly next time?
Each filling leaves some water in the plaster. If a mold goes back into use while it still holds much of that water, it draws fresh water from the slip more slowly. Two casts poured for the same length of time can therefore have different wall thicknesses, even when the shape of the cavity and the clay body are the same.
USG, a manufacturer of pottery plaster, describes problems at both ends of the range. Slow absorption can leave a soft cast that sticks. Very rapid absorption can make the clay next to the plaster shrink too soon and damage the surface. To investigate inconsistent results, USG suggests weighing molds of the same design at the same point in their casting cycle. USG compares the percentage of weight each mold loses during drying. A difference can point to uneven drying. If the molds still differ in weight when fully dry, their plaster mixes may have differed.
What does the seam tell you about the plaster mold?
A mold has to open around the shape it has made. The gray bowl can lift out of a round, open cavity. Compare it with Tony Hansen’s prototype stoneware mug. The handle curves back into the body, leaving an opening a solid block of plaster would occupy. In the photograph, each half of the working mold carries part of the handle’s outline. The halves can move apart to free the cast.
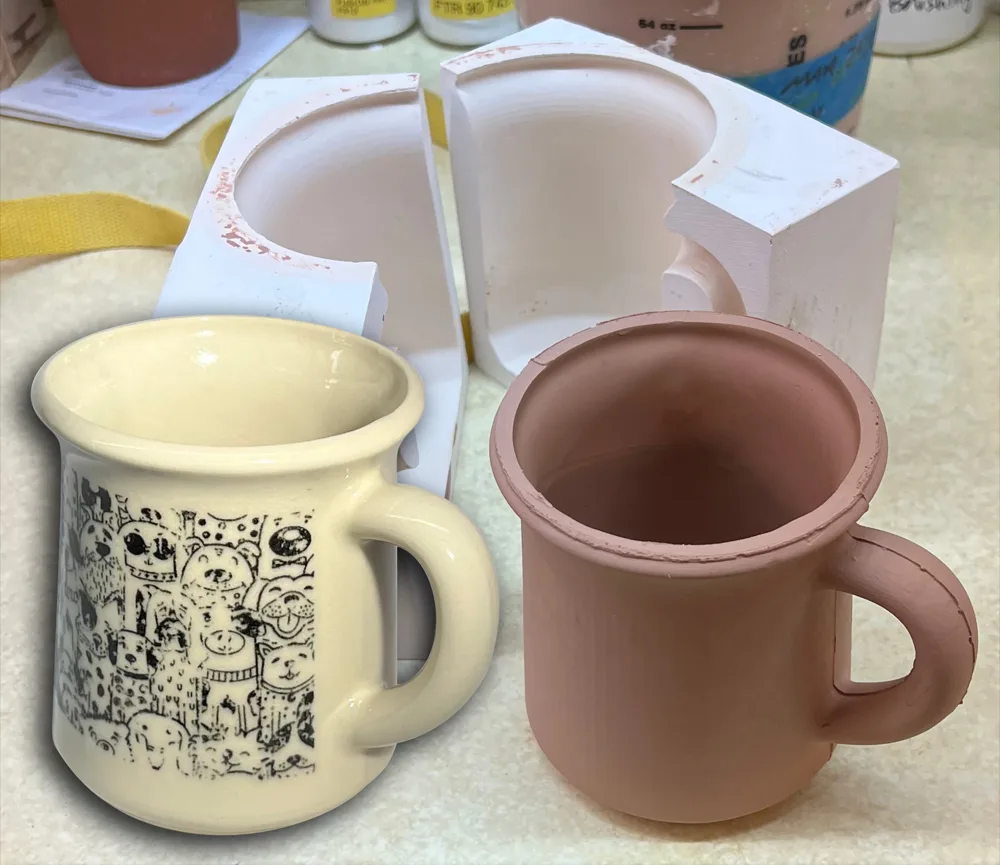
Hansen reports that the halves fit well and that the seam was generally easy to remove. The troublesome spot was underneath. He had to line up the halves carefully before tightening the strap around the mold to get a good join at the base. His project used 3D-printed tooling to make the plaster parts. The white plaster pieces in the photograph are the working mold that actually received the slip.
Hansen cast his mug in stoneware and di Petta cast his cup in earthenware. Both potters used the same forming method with different clay bodies. Look again at Hansen’s unfired mug. The rim shows how thick the clay wall grew, and the fine line along the handle shows where the mold halves met.