The China Dish guides
Slip Casting: Clay Slip, Molds and Ceramic Forms
Slip casting shapes ceramics by pouring liquid clay into an absorbent mold. As the mold draws out water, a clay wall builds against its surface; for a hollow vessel, the remaining liquid is drained away.
The method can repeat a detailed shape while leaving the maker decisions about the clay, the joints and the finished surface. Following that wall from liquid to a removable form makes the process easier to understand.
The slip’s flow, the mold’s geometry and the moment of release each solve a different part of the problem. Together, they explain both the appeal of casting and the places where a promising shape can go wrong.
A few details to notice
Look a little closer.
Read the object account and sources ↘
Read the object account and sources ↘
01 / A closer look
How does liquid clay become a wall?
- Liquid clay
- Absorbent mold
- Growing wall
An absorbent plaster mold draws water from casting slip. Clay collects at its surface, leaving a wall when surplus slip is drained.
How slip casting turns liquid clay into a wall ↗
From the referenced guide section and its sources.
02 / A closer look
Why does the slip’s flow matter?
Casting slip needs to flow through the mold and drain away. Its water content and dispersing behavior work together.
Casting slip: fluid clay with controlled water ↗
From the referenced guide section and its sources.
03 / A closer look
How does the cast come out?
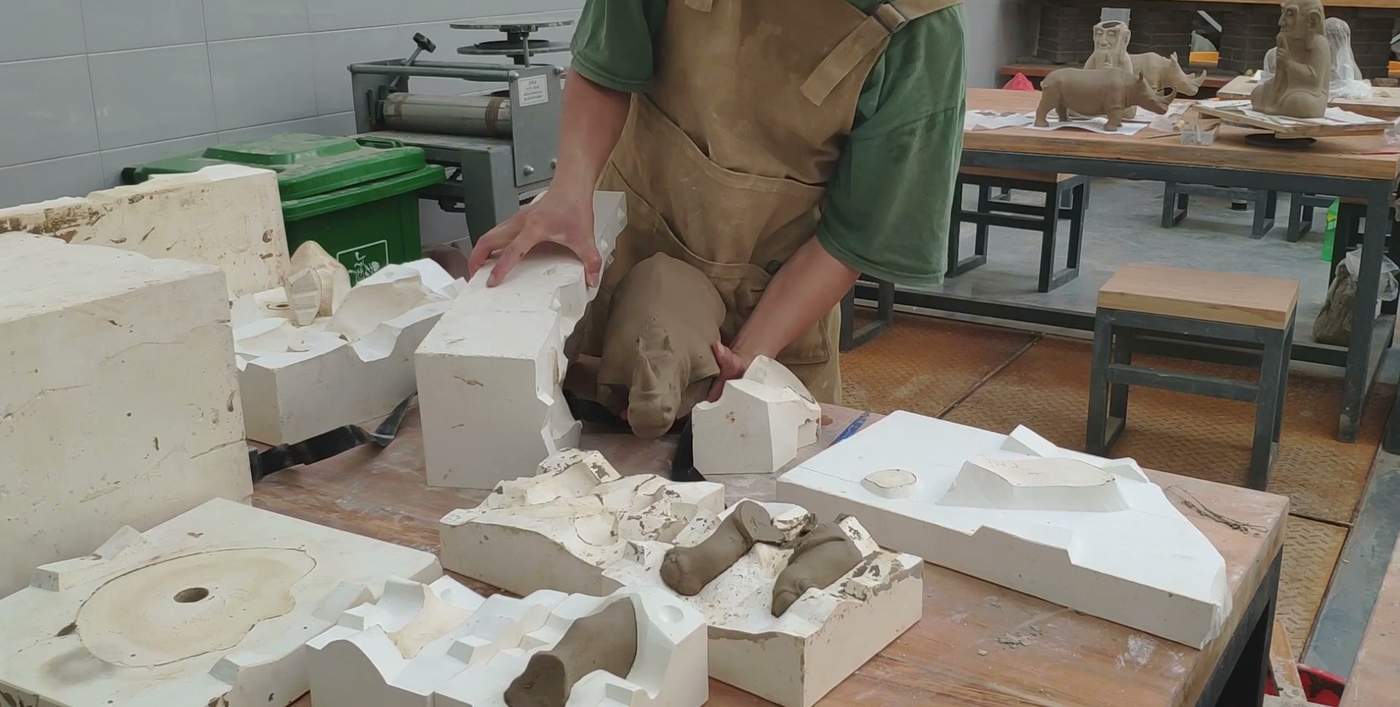
Mold divisions must let the firming clay form leave without damage. Projecting shapes can require several separate mold sections.
Plaster molds set the shape and its exit ↗
From the referenced guide section and its sources.
Making
Follow the wall through the mold
Wall formation, drainage and release happen at different moments. The cast must be firm enough to handle before the mold opens.
- 01Fill
Pour slip into the mold
- 02Build
Let the clay wall develop
- 03Drain
Remove the remaining liquid slip
- 04Release
Open the mold when the cast can support itself
01 / The guide
How slip casting turns liquid clay into a wall
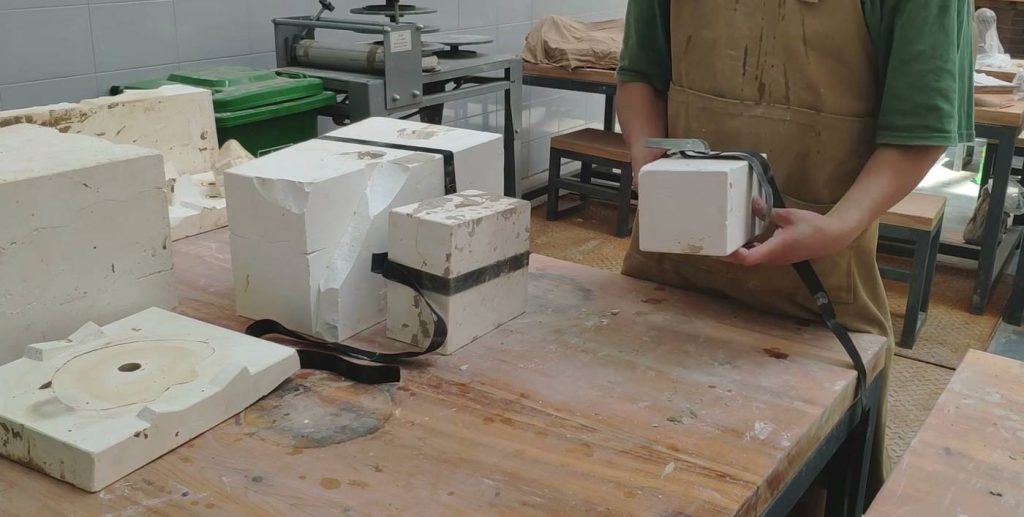
A casting mold provides a surface on which suspended clay particles collect as water moves into the mold. In ordinary pottery casting, porous plaster supplies that absorbent surface. The liquid clay fills the cavity, so it can reach contours that would take separate shaping actions in a lump of soft clay.
The wall develops where the slip touches the plaster. While the center remains fluid, the layer at the outside becomes firm enough to stay behind when the surplus slip drains out. The inside of a hollow cast therefore comes from the wall’s growth and drainage, while the mold directly defines the outside.
The clay is still fragile. More water must leave before the shell can support itself during handling. A slight shrinkage helps the cast pull away from the plaster, separating the act of draining from the later act of taking the piece out.
Casting gives the body its shape. A material name such as porcelain describes the ceramic body, so the two names can belong to the same object. A porcelain vessel can take its shape in a mold and still need drying, glazing and firing before it becomes the object used at a table.
02 / The guide
Casting slip: fluid clay with controlled water
The wall begins with a slip that can fill the mold and release water in a useful way. Casting slip is a suspension of clay-body materials in water, prepared for this job. Its behavior depends on the materials, their proportions and the way the suspension is mixed and adjusted.
Adding water makes a thick mixture easier to pour, but also gives the mold more water to remove.
A casting slip uses a dispersing additive, called a deflocculant, to help separate the particles and produce useful flow with less water. A fluid appearance alone therefore says little about how much solid material the slip carries.
Two measurements help distinguish those properties. Specific gravity compares the weight of slip with the weight of an equal volume of water. Viscosity describes resistance to flow. A slip can pour easily because of extra water or because its particles are well dispersed; those conditions can behave differently in the mold.
Tony Hansen’s Digitalfire explanation of deflocculation makes this distinction particularly useful: a given viscosity can occur at different specific gravities, and a given specific gravity can occur at different viscosities.
Water content and flow need to be considered together. Adjusting one while overlooking the other can make the next cast harder to interpret.
For me, “creamy” leaves a question unanswered: what’s making the slip flow? I’d want a record of its density, flow test and casting behavior to compare one batch with the next. That’s a more useful description than appearance alone. The target values belong to the chosen clay body and working process.
03 / The guide
Plaster molds set the shape and its exit
A well-behaved slip still needs a mold that can release the shape it creates. An open, tapering cavity may allow a form to lift out in one direction. A projecting handle or an enclosed contour can require a different arrangement, with separate mold parts or separately cast components.
The division into parts belongs to the design of the object. Each section must move away without trapping the clay. Where sections meet, their alignment affects the seam left on the cast. The location of a join can therefore matter to both the outline of the form and the cleanup it needs.
Plaster has another job here. An absorbent plaster casting mold and a hard gypsum tool can serve different purposes, even when both look like white blocks.
A case mold, in turn, is tooling used to produce working molds. In a digital workflow, a printed case can help make the plaster mold that actually receives the slip.
Mold making is its own sequence of decisions about the original model, dividing lines, registration and the chosen plaster.
For understanding casting, the key relationship is simpler: the mold must carry water away while holding a cavity from which the cast can emerge. Its shape and its absorbency have to work together.
04 / The guide
From filling the mold to a fired ceramic form
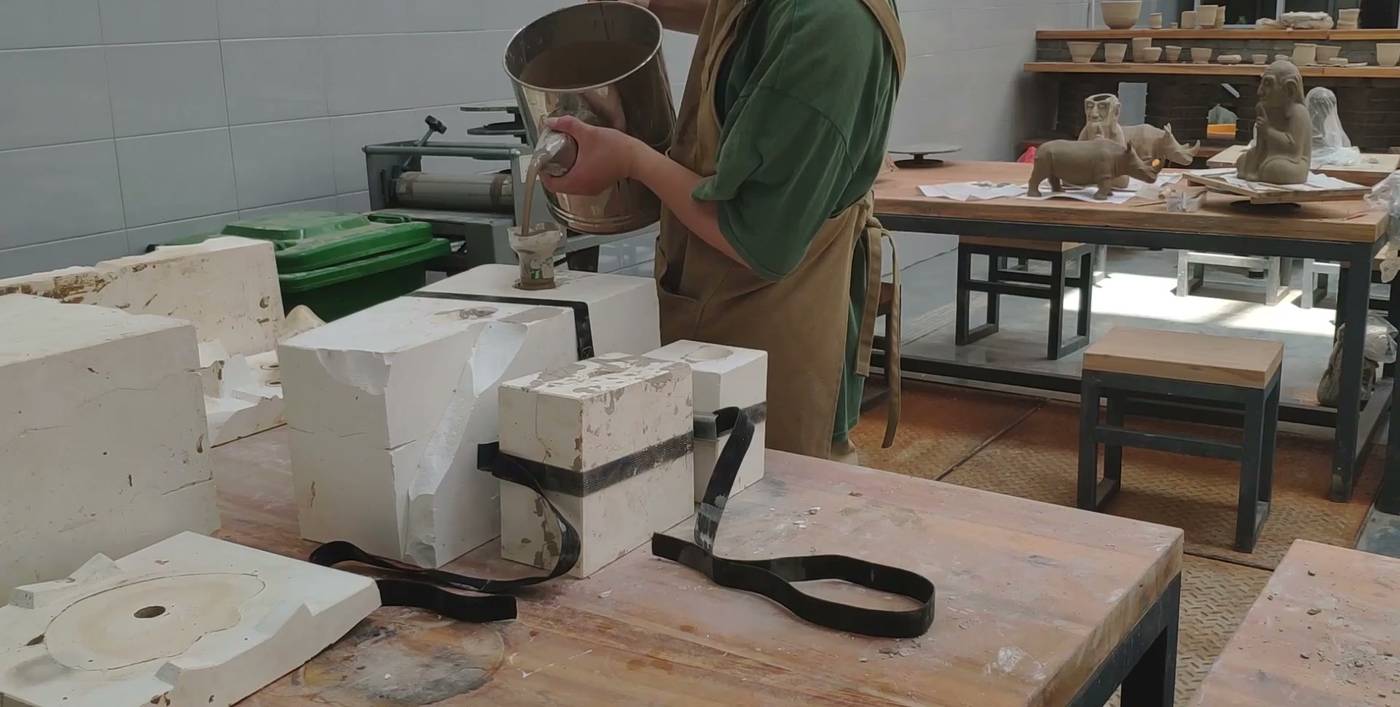
With the slip and mold prepared, a hollow cast develops through filling, wall formation, draining, release and finishing. The Crucible’s studio introduction follows that sequence with a two-part mold: the sections are aligned and secured, the slip is mixed, and enough is prepared to fill the mold in one pour.
The filled mold begins taking water from the slip. The liquid level can fall as the wall forms, so the reservoir is topped up during the cast. Leaving the mold filled longer builds a thicker wall under the same working conditions; the useful stopping point is established with the particular mold and slip.
Once the wall has formed, the remaining slip is poured into a clean receiving container and the mold is left to drain. Turning it back upright too soon can send drips onto the inner surface. The drained shell then firms up in the mold until it can keep its shape during removal.
The released piece is still unfired. The maker removes casting waste at the opening and cleans the marks where mold sections met. The Crucible then lets the piece reach the fully dry condition, often called bone-dry, before firing.
Decoration and firing follow the needs of the body and the intended surface. A mold has supplied a shape, but it hasn’t supplied a firing schedule or settled how the glaze will fit that body. Keeping those jobs distinct helps explain why an identical mold can lead to different finished ceramics.
05 / The guide
Repeated forms, individual ceramic decisions
The repeatable outline leaves room for choices that happen before and after each pour. Potter Linda Gates designed a jug with a four-part body mold and a separate two-part handle mold. Her body mold includes the sides, base and reservoir; after casting, the handle is cleaned and attached to the jug.
Gates chose casting partly for the smooth surfaces she wanted beneath digital decal decoration. A rough or awkward surface could complicate the image’s contact with the pot.
In her work, mold design, the joining of components and the decorated surface are connected decisions, even though the same cavity can supply another jug.
Digitalfire’s coffee-mug project gives a different view of that design labor. Hansen describes moving from elaborate early tooling to a lighter printed case mold, changing how the mold sections were produced and aligned. The repeatable object followed a process of revising the tools that made repetition possible.
Those examples change what I look for in a cast piece. I’m interested in where the maker put the work: in the original model, the split between mold sections, an added handle or a surface that carries an image. That’s work the maker can use again. Its consequences remain visible in every cast.
06 / The guide
Slip casting beside wheel throwing and handbuilding
Casting’s investment in a model and mold makes sense when the same designed form needs to return.
Wheel throwing shapes soft clay as it turns, and handbuilding assembles or models the clay directly. Each approach places the maker’s attention at a different point between the material and the finished outline.
A mold can carry complex contours into successive pieces. Direct forming lets the shape develop as the clay is worked. The useful comparison concerns the desired form, the number of repetitions and how much variation the maker wants to introduce, rather than a general ranking of one method above the others.
Methods can also meet within one object. Gates casts the jug and handle separately before joining them; Hansen’s wider technical work discusses cast and directly formed parts. A method name can describe an important stage without accounting for every action used to finish the pot.
The distinction between forming and material remains useful when comparing earthenware, stoneware and porcelain. Those body categories and the choice to cast answer different questions. Choosing a casting process still leaves a body to select and a fired result to evaluate.
07 / The guide
Reading slip-casting problems before changing the recipe
A poor cast can come from the slip, the mold’s condition or the way the form was handled. The symptom is a starting point for checking those relationships.
Changing the recipe immediately can hide a mold that has become wetter through successive casts or a piece that was removed before it had enough strength.
Digitalfire’s casting examples show why flow deserves close attention. A slip with too little deflocculant can gel and drain poorly; too much can also cause casting and release problems. Two troublesome batches may need different corrections even when both leave an unsatisfactory vessel.
| Observation | A useful relationship to examine |
|---|---|
| Casting slows during repeated use of one mold | The mold’s accumulated moisture and its opportunity to dry |
| Surplus slip hangs inside instead of draining cleanly | The slip’s flow and gelling behavior, alongside the drainage arrangement |
| The form distorts during removal | The cast’s firmness and the direction in which the mold parts separate |
| A raised line follows a mold division | The alignment of the parts and the cleanup of the cast seam |
The observations need their conditions alongside them. I’d keep the slip batch, mold, filling time and point of release in the same record, so there’s a comparison for the next cast. “Leave it longer” is an incomplete instruction. It loses the distinction between wall formation, drainage and readiness to handle.
08 / The guide
Looking beyond the mold seam
A seam can draw attention to a mold division, but a smooth surface may have been carefully cleaned after release. The finished object carries the results of several stages, and some traces of forming can disappear during finishing.
Surface appearance alone gives an incomplete account of how the vessel was made. I prefer to follow a specific feature back through the work.
A handle raises questions about separate casting and joining; an even outer contour points toward the model and cavity; an image on a smooth jug brings the prepared surface into view. Each feature opens a more useful question than whether a repeated shape required skill.
The clay wall is the link between those choices. It begins beside an absorbent surface, becomes firm enough to leave, and then continues through the work that turns an unfired shape into a ceramic object.
Seeing that sequence makes a mold’s contribution easier to recognize, along with the decisions the mold leaves to the maker.
Published · Updated